- Advertising
- Bare Metal
- Bare Metal Cloud
- Benchmarks
- Big Data Benchmarks
- Big Data Experts Interviews
- Big Data Technologies
- Big Data Use Cases
- Big Data Week
- Cloud
- Data Lake as a Service
- Databases
- Dedicated Servers
- Disaster Recovery
- Features
- Fun
- GoTech World
- Hadoop
- Healthcare
- Industry Standards
- Insurance
- Linux
- News
- NoSQL
- Online Retail
- People of Bigstep
- Performance for Big Data Apps
- Press
- Press Corner
- Security
- Tech Trends
- Tutorial
- What is Big Data
Building the Fastest Wordpress Stack: 2021 Edition
Two years ago I’ve written an article on how to build the fastest stack for Wordpress. It has attracted considerable interest and people continue to ask questions about it, on various channels.
However, the initial article is now obsolete, since many services have been updated in the meantime. Wordpress continues to be the most popular content management system, so it is time for a follow-up.
How Fast is the Fastest?
So, how do you build the fastest stack for Wordpress in 2021? First, there is no such thing as “the fastest stack”. In Linux, things can be done in multiple ways, so there are several high performance options available. This article describes one of them but keep in mind there are alternative services that you can use.
The Operating System
For this article, we will use a server that runs Ubuntu 20.04 LTS. Ubuntu has several advantages: it is frequently updated, and it provides the latest software packages and modern kernel versions. The operating system itself can be upgraded to the next major release, which is a big plus.
In addition, the RedHat world is currently in turmoil after the announcement that CentOS will no longer be maintained. It will be replaced by CentOS Stream, which is a testing distribution, unsuitable for a production system.
While free RHEL rebuilds, such as AlmaLinux or Rocky Linux, have already been released or are being developed, there is no guarantee they will be supported on the long term, so Ubuntu is the logical choice for now.
Installing Packages
Before package installation, make sure your system is up to date by running the following commands (if a new kernel is installed during the process, reboot the system before you continue):
apt update
apt upgrade
Since Wordpress is always quick to support the latest php versions available, we will install php 8.0:
add-apt-repository ppa:ondrej/php
apt install php8.0

You will notice that installing php also installs Apache by default. Since we will use a different webserver, remove Apache and any other packages that are not needed:
apt purge apache2
apt autoremove
To be closer to a production environment, Wordpress needs several php modules (some are optional, but it’s better to have them anyway), so let’s install those as well:
apt install php8.0-curl php8.0-fpm php8.0-gd php8.0-intl php8.0-imagick php8.0-mysql php8.0-mbstring php8.0-mcrypt php8.0-zip php8.0-xml php8.0-xmlrpc
Install a few other packages required by some php extensions, then enable and start the php-fpm service:
apt install ghostscript imagemagick
systemctl enable php8.0-fpm
systemctl start php8.0-fpm
There are several options for the database, such as Percona 8 or MariaDB 10.4. These are both very fast, but I went with MySQL 8 for this stack, because it offers both high performance and compatibility and it is backed by a strong team of developers. Here is how you install it:
wget https://dev.mysql.com/get/mysql-apt-config_0.8.16-1_all.deb
dpkg -i mysql-apt-config_0.8.16-1_all.deb
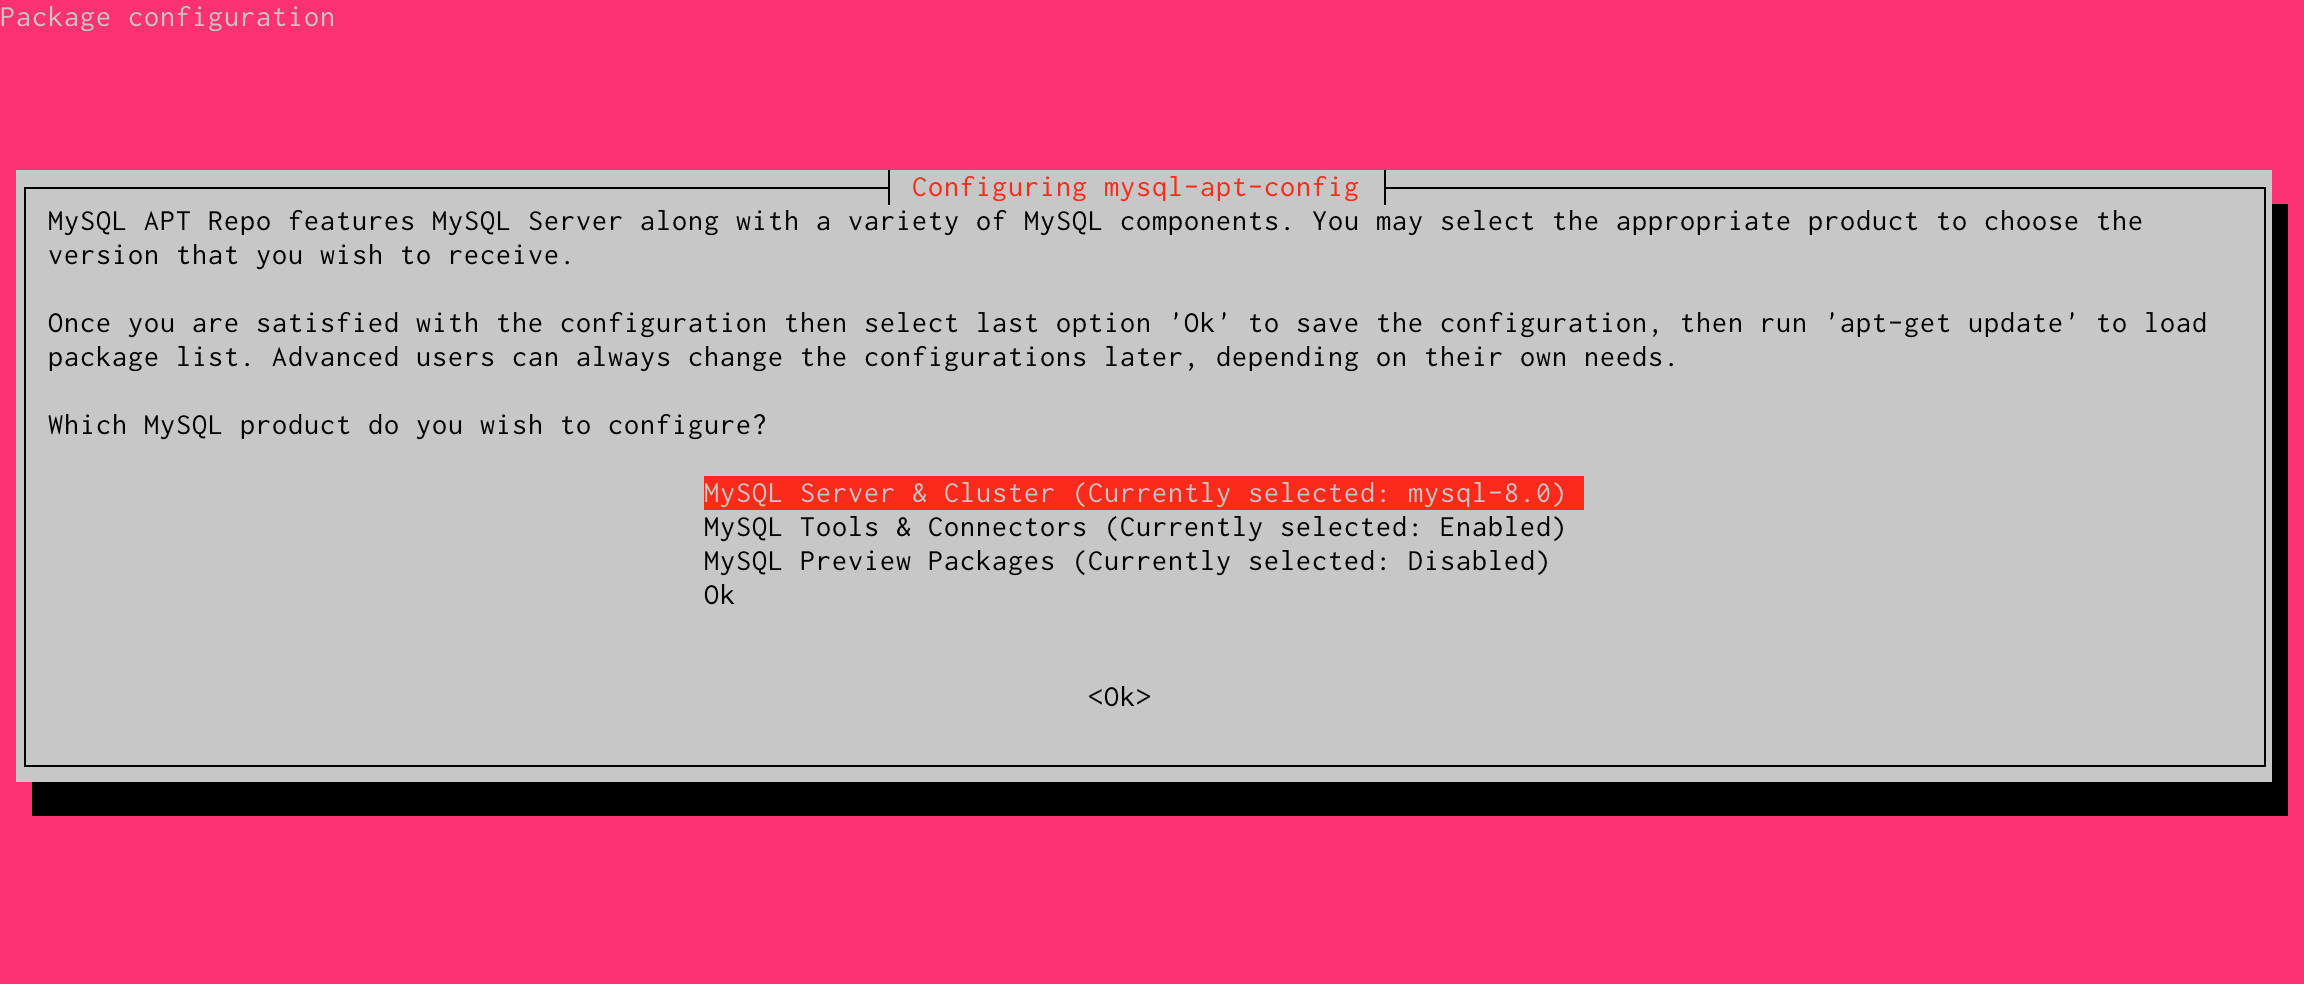
Choose the first option in both screens in the Package configuration dialogue, click Ok, and then continue the installation:
apt update
apt install mysql-client mysql-community-server
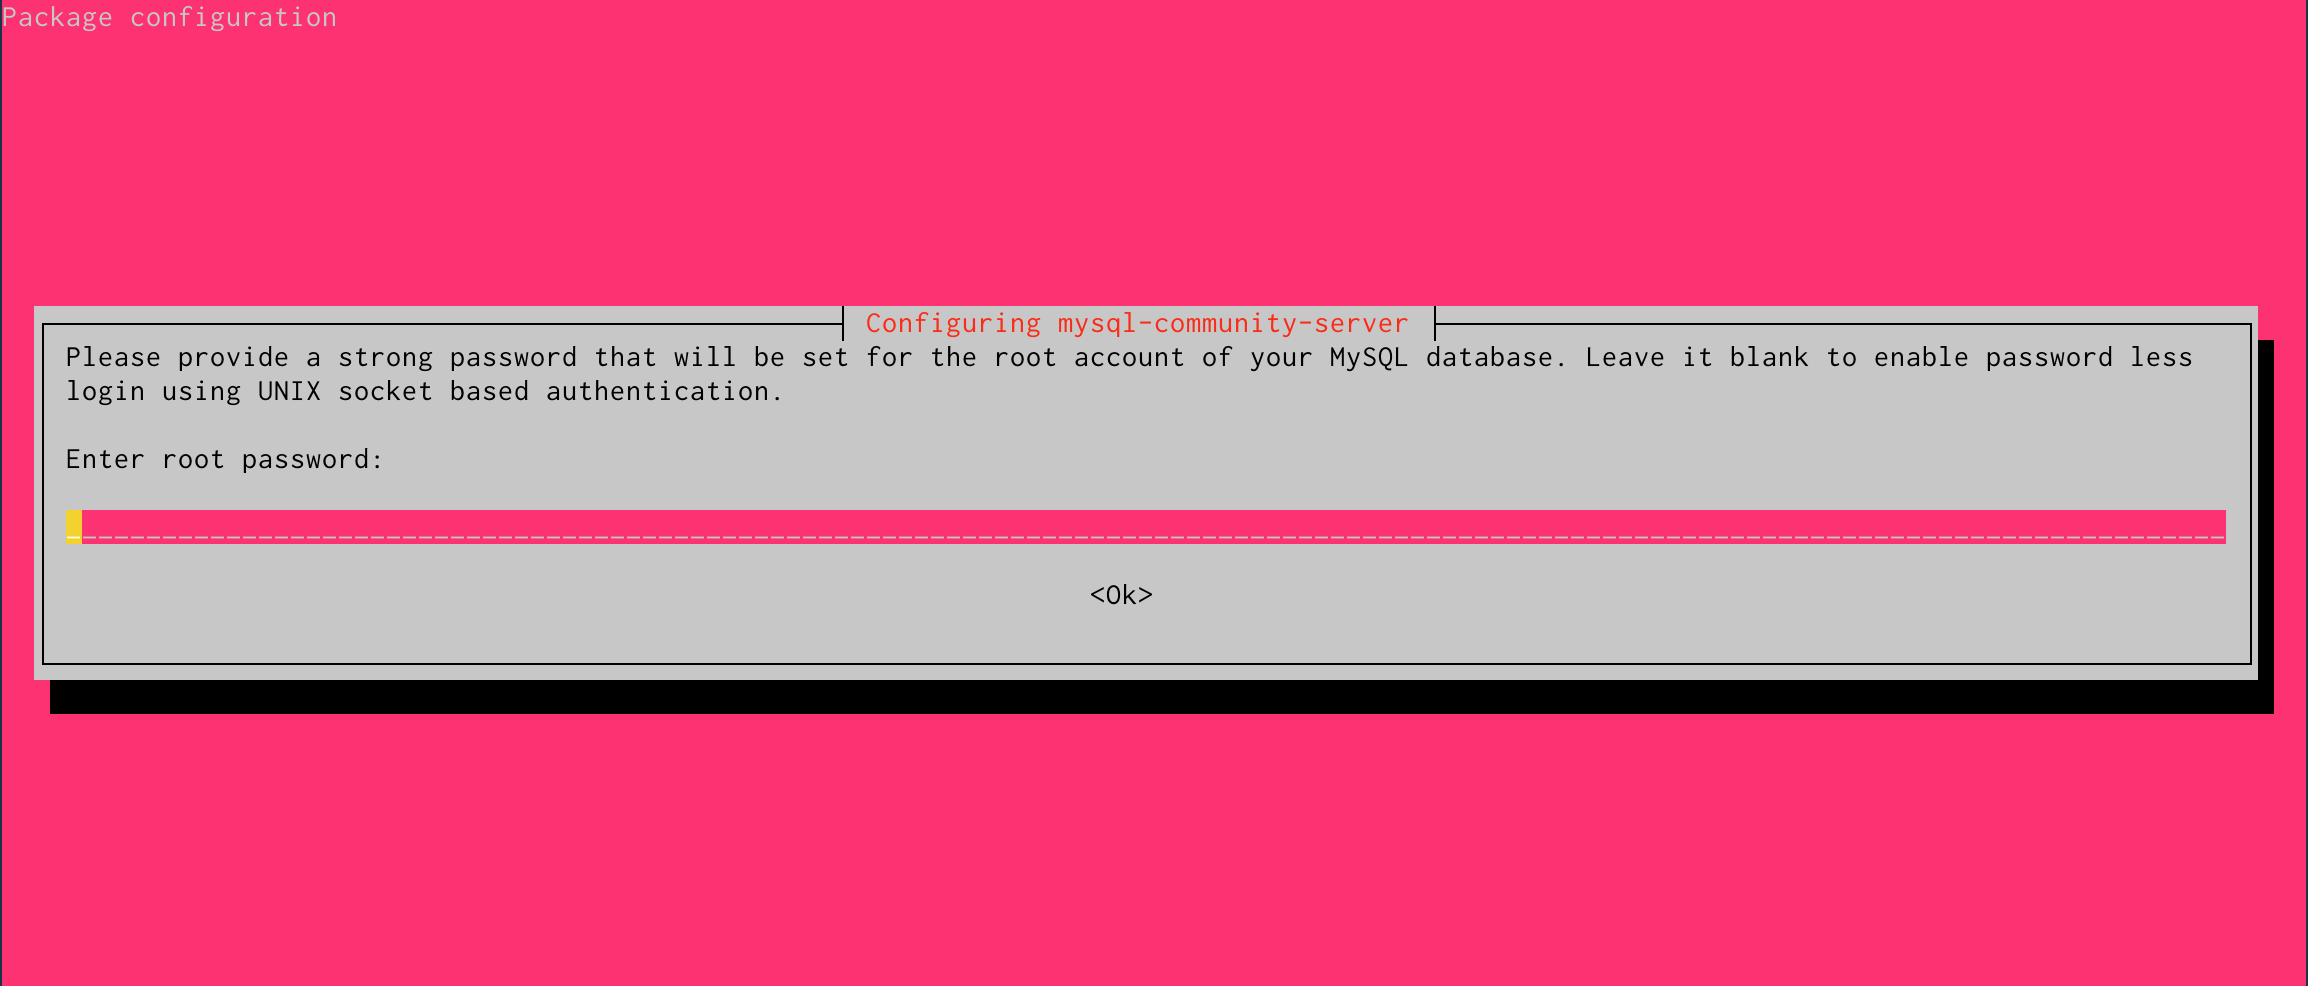
You will be required to choose a strong password for the MySQL root account, copy it because you will need it later.
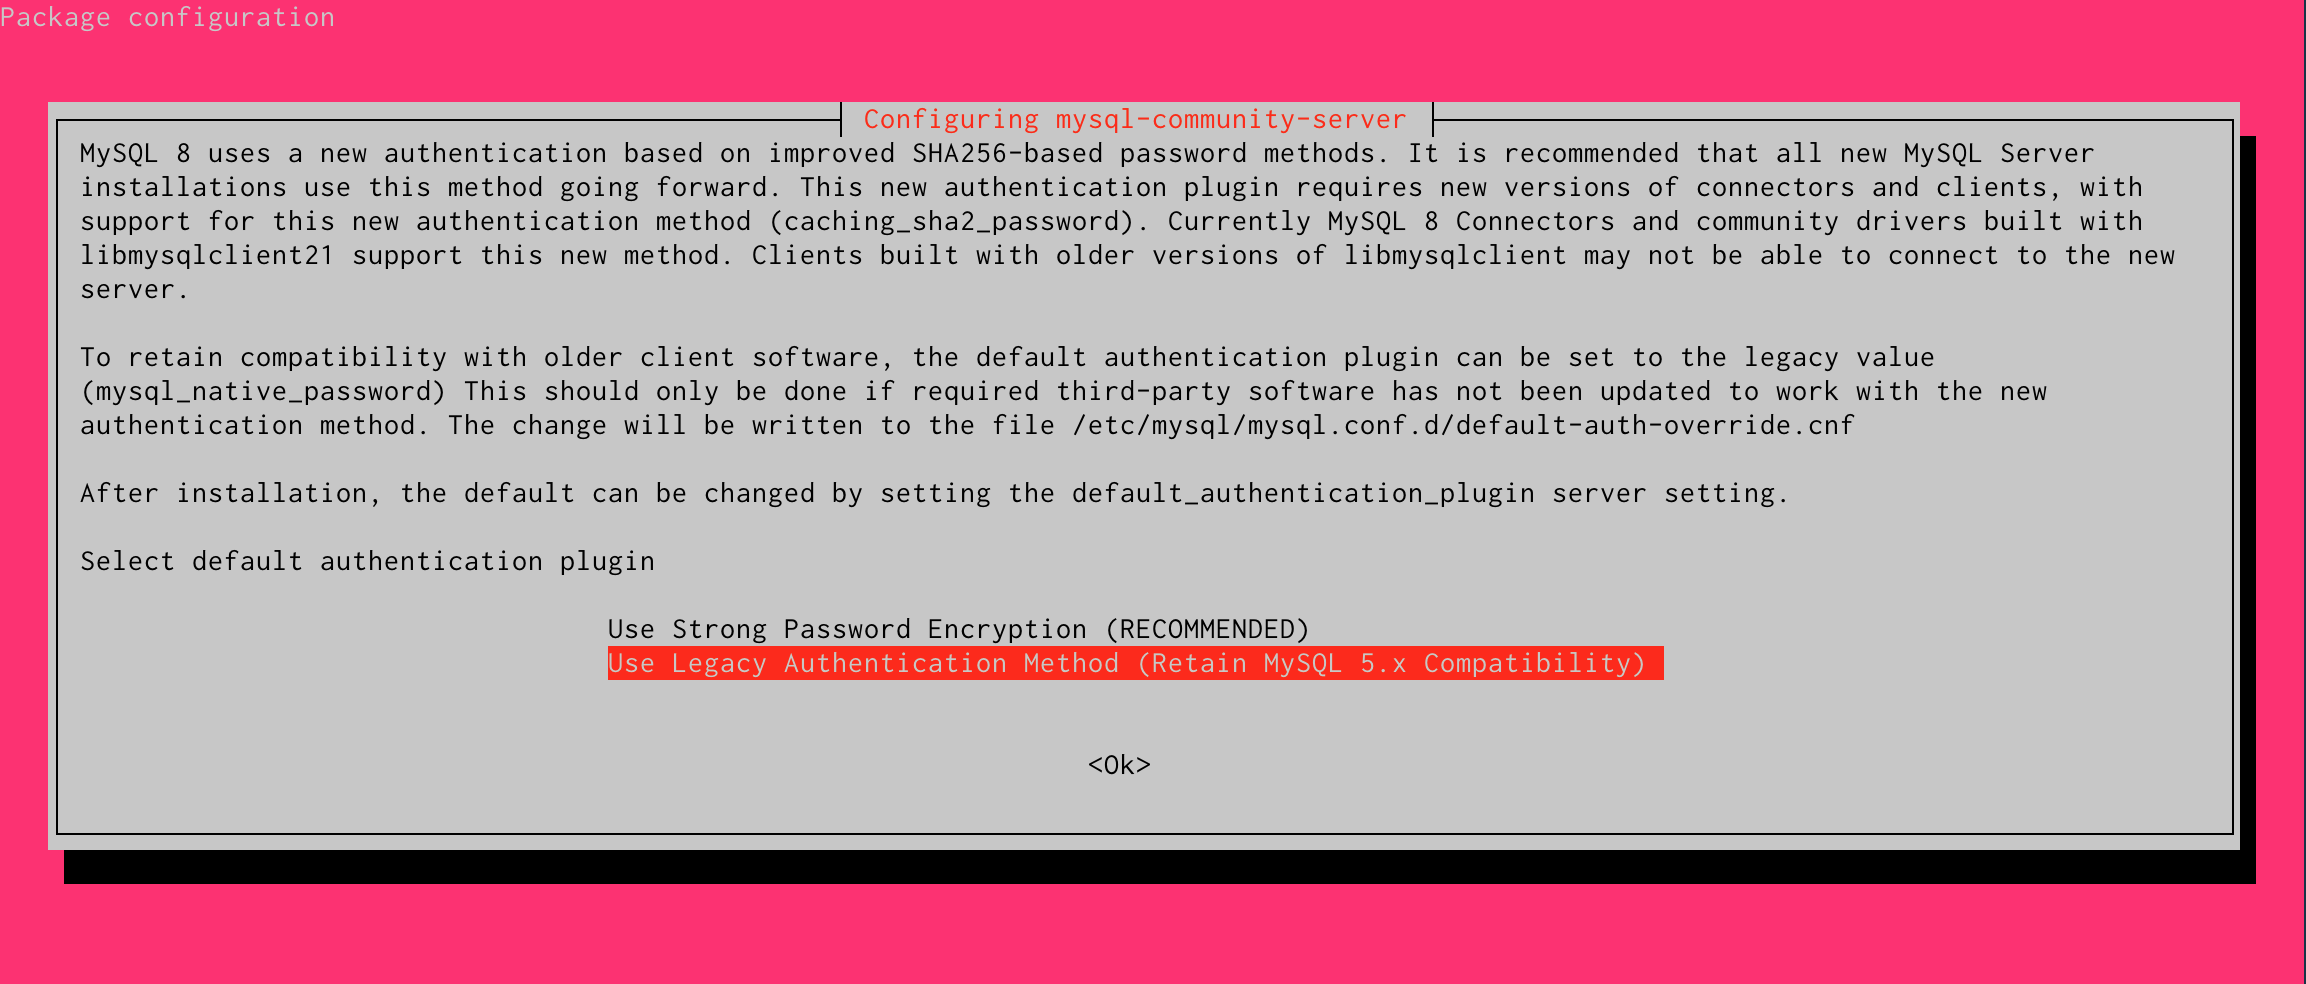
In the next step, choose to Use Legacy Authentication Method for compatibility reasons, especially if you plan to migrate an existing Wordpress installation.
MySQL 8 is now installed; run the following command to secure it:
mysql_secure_installation
You will be presented with several choices, we recommend disabling the Validate Password component, removing anonymous users, disallowing loot login remotely, removing test database and access to it, and finally reloading privilege tables.
For the webserver, there are several options again. Caddy is an interesting one, with many automated features and very easy configuration. However, it is not as fast as Nginx. Litespeed can outperform Nginx (even its OpenLitespeed free version) but can be tricky to configure and its documentation is quite poor. We will stick with Nginx for now, so install it along with Redis for object caching and a few other useful packages:
apt install nginx redis zip unzip
Configure Redis
All needed services are now installed, so it’s time to configure them. We will start with the Redis configuration file, edit /etc/redis/redis.conf with your favorite text editor.
You want Redis to use RAM only and never write on disk, for the best performance. Find the lines that configure disk snapshots and comment them out:
save 900 1
save 300 10
save 60 10000
Add two lines at the end of the file to set the maximum memory use (this depends on your total available RAM) and force the deletion of old keys:
maxmemory 1G
maxmemory-policy allkeys-lru
Save the changes and restart Redis with the new settings:
systemctl restart redis
Setup Nginx
Create a folder for your site and set up the correct ownership:
mkdir /var/www/html/wordpress
chown -R www-data:www-data /var/www/html/wordpress
Use a text editor to create a configuration file in the /etc/nginx/conf.d folder, name it your.domain.conf. You can find many Nginx configurations online that are tweaked for optimal Wordpress performance, but let’s start with a minimal one like this:
server {
listen 80;
listen [::]:80;
root /var/www/html/wordpress;
index index.php index.html index.htm;
server_name your.domain;
error_log /var/log/nginx/ your.domain _error.log;
access_log /var/log/nginx/ your.domain.com_access.log;
client_max_body_size 100M;
location / {
try_files $uri $uri/ /index.php?$args;
}
location ~ \.php$ {
include snippets/fastcgi-php.conf;
fastcgi_pass unix:/run/php/php8.0-fpm.sock;
fastcgi_param SCRIPT_FILENAME $document_root$fastcgi_script_name;
}
}
Restart Nginx to load the new configuration file:
systemctl restart nginx
Create a Database
Wordpress uses MySQL to store data in the backend. Before installing Wordpress, you need to have a database and user for it, so connect to MySQL from the command line, using the root password chosen during the installation process:
mysql -u root -p
Create a database and user and then flush privileges and exit the MySQL CLI:
mysql> CREATE DATABASE <database_name>;
mysql> CREATE USER '<user_name>'@'localhost' IDENTIFIED BY ‘<password>’;
mysql> GRANT ALL PRIVILEGES ON <database_name>.* TO '<user_name>'@'localhost';

mysql> FLUSH PRIVILEGES;

mysql> EXIT
Install Wordpress
It is time to install Wordpress itself, download the latest version and unpack it in the document root of the site:
cd /var/www/html
wget https://wordpress.org/latest.zip
unzip latest.zip

chown -R www-data:www-data /var/www/html/wordpress
rm latest.zip
Complete the installation by accessing your domain in a browser, you will be asked to enter the database credentials and choose a user and password for the administration backend.
Wordpress should now be installed and working, but a few additional configuration steps are needed.
Final Tweaks
Any modern site needs a SSL certificate and you can quickly get a free one thanks to Let’s Encrypt:
apt install python3-certbot-nginx
certbot --nginx -d <your_domain>
The certbot plugin makes SSL installation very easy, it automatically updates Nginx settings, and you can even choose to setup a redirect to https, so that all the traffic is encrypted (recommended). A cronjob is also configured to automatically renew your certificate when it expires.
You should now install a plugin for Redis. This is done from the Wordpress backend and there are several options, the Redis Object Cache plugin seems to perform better than the official one provided by Wordpress. Regardless of your choice, install the plugin from the Dashboard, and activate it.
The final steps are to update the php and MySQL settings for optimal performance since the default ones are outdated. There are many tweaks that can improve performance, but make sure to at least change the important ones.
Edit the file /etc/php/8.0/fpm/php.ini and adjust the following settings:
max_execution_time = 5000
memory_limit = 512M
upload_max_filesize = 128M
post_max_size = 128M
MySQL configuration is trickier, because there are many parameters that must be tuned based on the resources of your server. Unless you are an experienced database administrator, you should not try to change these values.
However, you can use a tool named MySQLTuner that scans your database and suggests the correct settings to increase performance and stability. Apply those values by editing the /etc/my.cnf file and then restart both php-fpm and MySQL with the new settings:
systemctl start php8.0-fpm
systemctl restart mysql
Congratulations, you now have one of the fastest Wordpress stacks available! Keep in mind that I tried to keep this tutorial simple and there are many other tweaks that can make your site run even faster. For any suggestions or questions, comment below and I’ll be sure to reply. For any additional information, you can always contact us.
Readers also enjoyed:
Best Command-Line Editors in Linux


Leave a Reply
Your email address will not be published.