- Advertising
- Bare Metal
- Bare Metal Cloud
- Benchmarks
- Big Data Benchmarks
- Big Data Experts Interviews
- Big Data Technologies
- Big Data Use Cases
- Big Data Week
- Cloud
- Data Lake as a Service
- Databases
- Dedicated Servers
- Disaster Recovery
- Features
- Fun
- GoTech World
- Hadoop
- Healthcare
- Industry Standards
- Insurance
- Linux
- News
- NoSQL
- Online Retail
- People of Bigstep
- Performance for Big Data Apps
- Press
- Press Corner
- Security
- Tech Trends
- Tutorial
- What is Big Data
Kubernetes on Bare Metal Cloud
Kubernetes is gaining increasingly more ground in many companies and many applications. Most of you already use GCP and AWS to deploy a Kubernetes cluster as it’s stress-free and ready to use. But what if you wanted to customize your setup? What if you wanted to max out the security and keep it on premise? You can build your own Kubernetes cluster on bare metal. Or better, on a bare metal cloud.

In this tutorial, I present two options for you to deploy a Kubernetes cluster: one standalone node (for testing/developing environments) and a multi-node cluster (production-ready).
1. How to set up a standalone node on CentOS 7
For the first setup, I’ve used a bare metal instance of 8 cores and 32 GB RAM with SSD storage running CentOS 7.
The first step is to configure the repo:
cat <<EOF > /etc/yum.repos.d/kubernetes.repo
[kubernetes]
name=Kubernetes
baseurl=https://packages.cloud.google.com/yum/repos/kubernetes-el7-x86_64
enabled=1
gpgcheck=1
repo_gpgcheck=1
gpgkey=https://packages.cloud.google.com/yum/doc/yum-key.gpg https://packages.cloud.google.com/yum/doc/rpm-package-key.gpg
EOF
Disable SELinux:
setenforce 0
sed -i --follow-symlinks 's/SELINUX=enforcing/SELINUX=disabled/g' /etc/sysconfig/selinux
Setting SELinux in permissive mode by running setenforce 0 and sed effectively disables it. This is required to allow containers to access the host filesystem, which is needed, for example, by pod networks. You have to do this until SELinux support is improved in the kubelet.
Install packages:
yum install -y docker kubelet kubeadm kubectl
systemctl enable docker
systemctl start docker
systemctl enable kubelet
Some users on RHEL/CentOS 7 have reported issues with traffic being routed incorrectly due to iptables being bypassed. You should ensure net.bridge.bridge-nf-call-iptables is set to 1 in your sysctl config, e.g.
cat <<EOF >  /etc/sysctl.d/k8s.conf
net.bridge.bridge-nf-call-ip6tables = 1
net.bridge.bridge-nf-call-iptables = 1
EOF
sysctl -system
Make sure that the br_netfilter module is loaded before this step. This can be done by running:
lsmod | grep br_netfilter
In order to load it, explicitly call:
modprobe br_netfilter
Set swap to OFF:
swapoff -a
Check /etc/fstab file and comment out the swap mounting point

Initialize Kubernetes node:
kubeadm init --pod-network-cidr=10.244.0.0/16
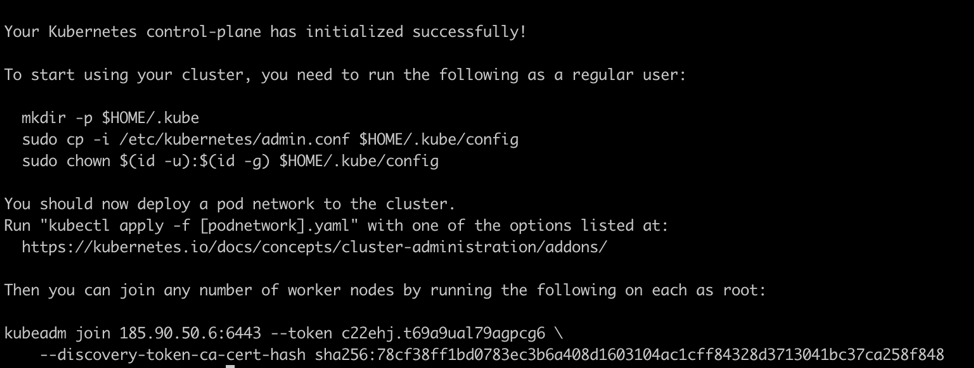
In this case, you don’t need to run the join command as you want a standalone server.
Since $HOME is /root/ in my case it looks something like:
mkdir /root/.kube
cp -i /etc/kubernetes/admin.conf /root/.kube/config
Implement networking model using Flannel:
kubectl apply -f https://raw.githubusercontent.com/coreos/flannel/a70459be0084506e4ec919aa1c114638878db11b/Documentation/kube-flannel.yml

And make this node a standalone one:
kubectl taint nodes --all node-role.kubernetes.io/master-
kubectl get nodes

Ta-da! You now have a standalone node on CentOS 7!
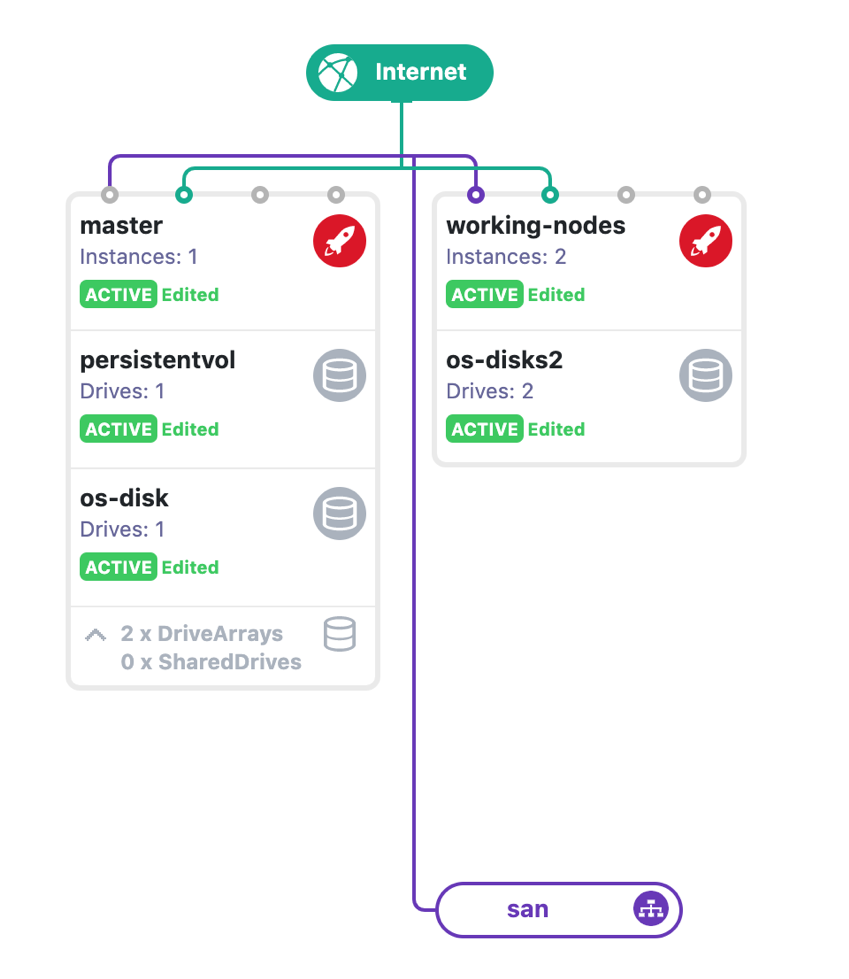
2. How to set up a multi-node cluster on Ubuntu 18.04
For this production-ready environment, I’ve used 3 instances of 8 cores, 32GB RAM with SSD storage. For the master node, I have added another disk drive to use it as an NFS persistent storage.
For each node run the following:
Configure repo:
apt update && apt install -y apt-transport-https curl
curl -s https://packages.cloud.google.com/apt/doc/apt-key.gpg | apt-key add -

cat <<EOF >/etc/apt/sources.list.d/kubernetes.list
deb https://apt.kubernetes.io/ kubernetes-xenial main
EOF
apt update
Disable swap:
swapoff -a
Check /etc/fstab file and comment out the swap mounting point
Install packages:
apt install -y  docker.io kubelet kubeadm kubectl
systemctl enable docker
Make sure that the br_netfilter module is loaded before this step. This can be done by running:
lsmod | grep br_netfilter
In order to load it, explicitly call:
modprobe br_netfilter
Then initialize Kubernetes node on the master node:
kubeadm init --pod-network-cidr=10.244.0.0/16
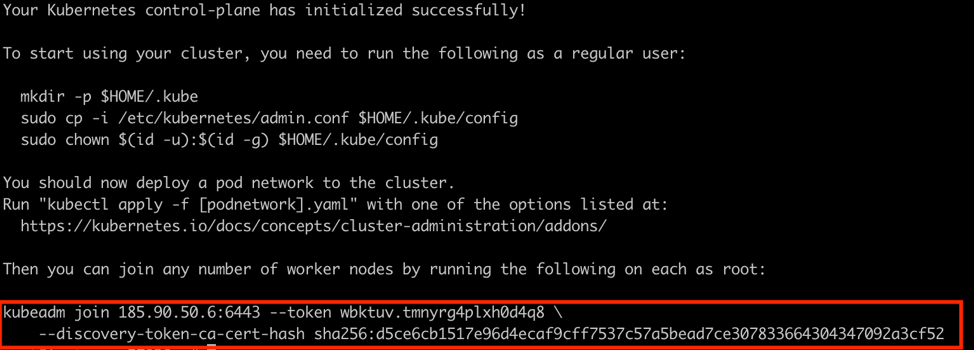
mkdir $HOME/.Kube
cp -i /etc/kubernetes/admin.conf $HOME/.kube/config
kubectl apply -f https://raw.githubusercontent.com/coreos/flannel/a70459be0084506e4ec919aa1c114638878db11b/Documentation/kube-flannel.yml
Join the other two working nodes to the master by running the command in the output of init:
kubeadm join 185.90.50.6:6443 --token wbktuv.tmnyrg4plxh0d4q8 \
    --discovery-token-ca-cert-hash sha256:d5ce6cb1517e96d4ecaf9cff7537c57a5bead7ce307833664304347092a3cf52
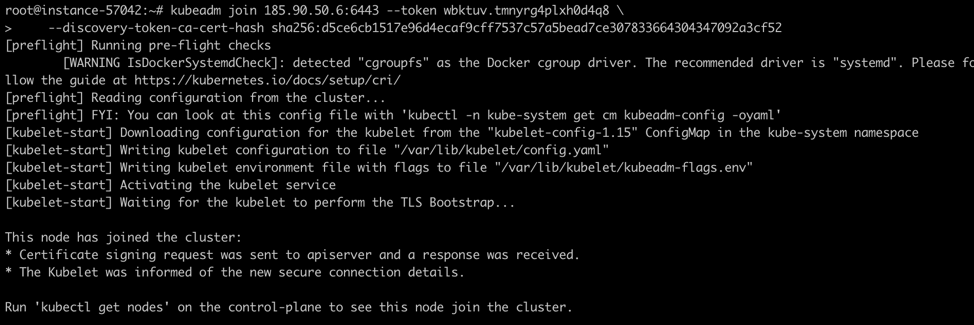
On the master node, check the nodes:
kubectl get nodes

Install a kubeadmin dashboard. If you are used to a UI, you can install a dashboard similar to the one Google uses.
kubectl apply -f https://raw.githubusercontent.com/kubernetes/dashboard/v1.10.1/src/deploy/recommended/kubernetes-dashboard.yaml
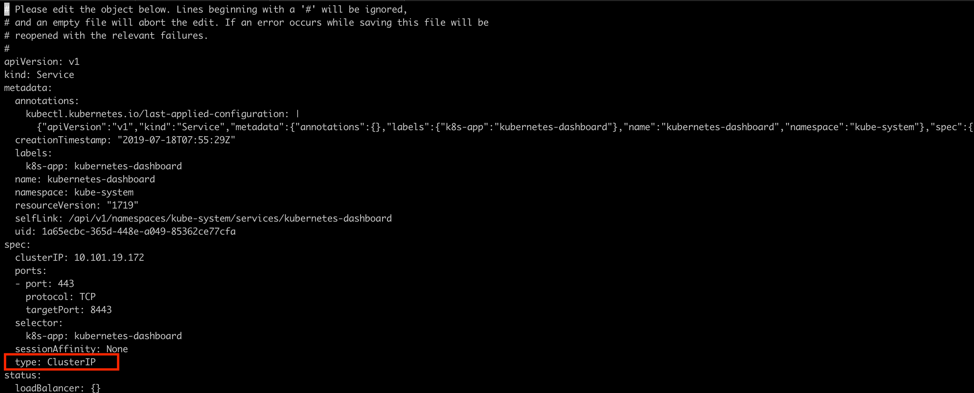
Edit the service in order to expose it. Change ClusterIP to NodePort:
kubectl --namespace kube-system edit service kubernetes-dashboard
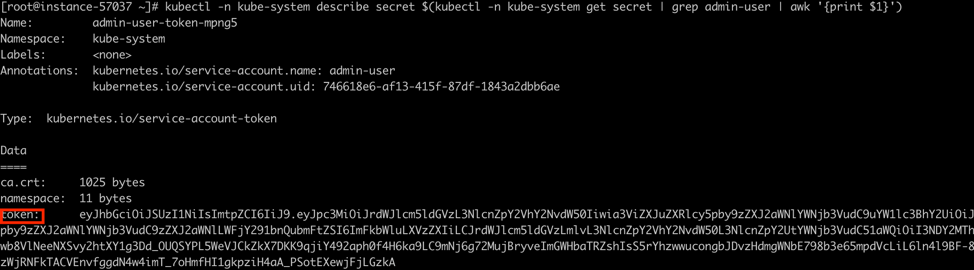
Create a service account and get authentication token and create two yaml files accordingly:
vim dashboard-admin.yaml

apiVersion: rbac.authorization.k8s.io/v1
kind: ClusterRoleBinding
metadata:
  name: admin-user
roleRef:
  apiGroup: rbac.authorization.k8s.io
  kind: ClusterRole
  name: cluster-admin
subjects:
- kind: ServiceAccount
  name: admin-user
  namespace: kube-system

vim dasboard-adminuser.yaml

apiVersion: v1
kind: ServiceAccount
metadata:
  name: admin-user
  namespace: kube-system

kubectl apply -f dashboard-admin.yaml

kubectl apply -f dashboard-adminuser.yaml
Get token:

Start kube proxy in a screen:
screen
kubectl proxy
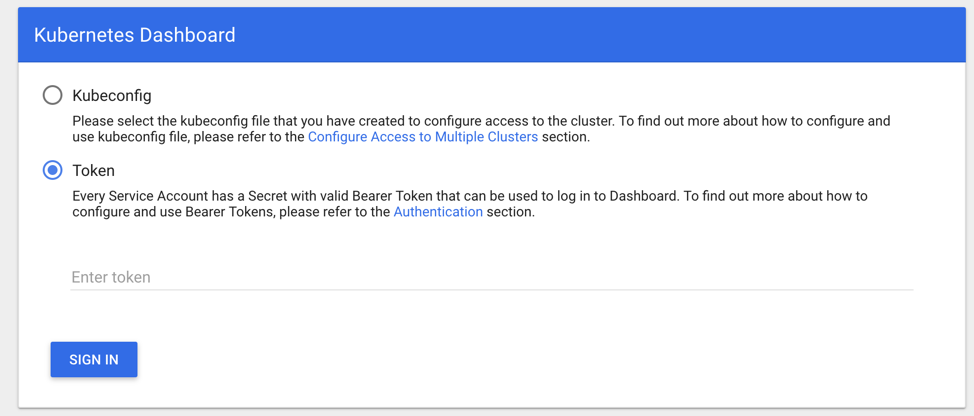
Connect to the UI dashboard using the node’s IP and external port:
[root@instance-57037 ~]# kubectl --namespace kube-system get service kubernetes-dashboard
NAME                   TYPE       CLUSTER-IP      EXTERNAL-IP   PORT(S)         AGE
kubernetes-dashboard   NodePort   10.101.19.172   <none>        443:30777/TCP   3m
https://your_nodes_IP:30777 and use the token from above.
This is it! You now have two options to build your own Kubernetes cluster and a way to use a dashboard to manage it by UI.
The main advantages of using Bigstep Bare Metal Cloud for deploying your customized Kubernetes cluster are:
- Having the performance of a bare metal and the flexibility of a cloud (you can upgrade the hardware specs anytime)
- Skipping the virtualization layer
- In case of hardware failure, you only lose the compute power, and not the data
However, keep in mind that:
- You have to manually install the cluster and customize it
- Depending on your security settings/protocols, you may encounter some setup issues regarding iptables
Please contact us by email if you have any questions or would like to suggest additional performance tweaks. Furthermore, if you are in need of bare metal cloud, you know where to find us.
About the author
Rares Cosereanu is one of Bigstep’s tech-savvy Senior Systems Administrators, huge fan of cloud architectures and open source containerized distributed solutions.
Readers also enjoyed:
Nginx in WHM, what is the best option?


Leave a Reply
Your email address will not be published.