- Advertising
- Bare Metal
- Bare Metal Cloud
- Benchmarks
- Big Data Benchmarks
- Big Data Experts Interviews
- Big Data Technologies
- Big Data Use Cases
- Big Data Week
- Cloud
- Data Lake as a Service
- Databases
- Dedicated Servers
- Disaster Recovery
- Features
- Fun
- GoTech World
- Hadoop
- Healthcare
- Industry Standards
- Insurance
- Linux
- News
- NoSQL
- Online Retail
- People of Bigstep
- Performance for Big Data Apps
- Press
- Press Corner
- Security
- Tech Trends
- Tutorial
- What is Big Data
How to use Docker on Full Metal

Let’s be honest: Docker loves bare metal. Running Docker inside a VM (which is the only option with almost all public clouds) is simply a waste of time and money. VMs are known for being slow in handling in-memory workloads, such as those generated by NoSQL databases or Spark. This is due to the high TLB miss ratio that these technologies naturally incur.
On the Full Metal Cloud containers run at bare metal performance and also have access to our state of the art layer 2 network to bridge. This allows our users to forget about IP management and just let Docker do its job.
How to install Docker on the Full Metal Cloud
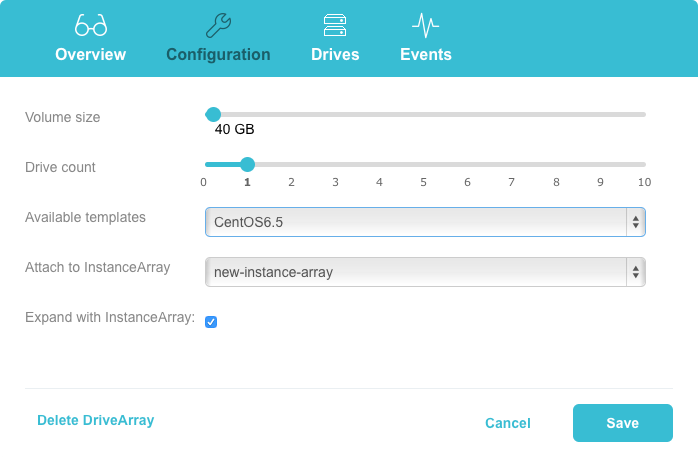
1. Start with a Vanilla CentOS template.
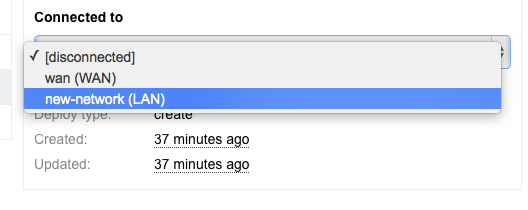
Make sure you have connected your instances to a secondary LAN (layer 2 broadcast domain) network.
2. Hit Deploy, wait for the machines to boot, then install Docker. It’s as easy as this:
# rpm -i http://dl.fedoraproject.org/pub/epel/6/x86_64/epel-release-6-8.noarch.rpm
# yum -y install device-mapper-event-libs.x86_64 docker-io
Limited offer! Try 14 days of Docker on Full Metal for free - limited to 100 applicants. Start here.
How to configure networking
Docker has multiple ways of working with the network. Most of the users are ok with forwarding ports to the host (the -p option). Nevertheless, sometimes the containers need a private network. The Full Metal Cloud has this beautiful network design that allows you to actually pass Layer 2 traffic between any two points.
Let’s exploit that and link our Docker bridges together.
0. If you have started Docker already you will need to delete the existing bridge, because we need to reconfigure it.
# ifconfig docker0 down
# brctl delbr docker0
1. Preconfigure the docker0 bridge with different IP ranges and setup a route. Create a new file /etc/sysconfig/network-scripts/ifcfg-docker0 and add something like this:
DEVICE=docker0
TYPE=Bridge
BOOTPROTO=static
IPADDR=172.17.0.1
NETMASK=255.255.0.0
ONBOOT=yes
IMPORTANT!
Change the IP address to something different on each host like:
- -172.17.0.1 for the first
- -172.17.1.1 the second
- -172.17.2.1 the third host.
Docker will use this address to allocate IPs to the containers on each host. Make sure the netmask is 255.255.0.0 on all the them so that the hosts know how to route the traffic between them. Also if you change the IP range from 172.17.2.1 you will also have to change the NAT settings of the hosts’s firewall (iptables -L -t nat).
2. Identify the interface that is linked to the LAN network. This is usually the interface which has status UP but has no IP configured.
[root@instance-3903 ~]# ip a
1: lo: <loopback,up,lower_up> mtu 16436 qdisc noqueue state UNKNOWN
    link/loopback 00:00:00:00:00:00 brd 00:00:00:00:00:00
    inet 127.0.0.1/8 scope host lo
    inet6 ::1/128 scope host
       valid_lft forever preferred_lft forever
2: ibft0: <broadcast,multicast,up,lower_up> mtu 1500 qdisc mq state UP qlen 1000
    link/ether f0:92:1c:0d:20:90 brd ff:ff:ff:ff:ff:ff
    inet 100.64.16.18/30 brd 100.64.16.19 scope global ibft0
    inet6 fe80::f292:1cff:fe0d:2090/64 scope link
       valid_lft forever preferred_lft forever
3: eth1: <broadcast,multicast,up,lower_up> mtu 1500 qdisc mq state UP qlen 1000
    link/ether f0:92:1c:0d:20:94 brd ff:ff:ff:ff:ff:ff
    inet 84.40.61.210/28 brd 84.40.61.223 scope global eth1
    inet6 fe80::f292:1cff:fe0d:2094/64 scope link
       valid_lft forever preferred_lft forever
4: eth2: <broadcast,multicast,up,lower_up> mtu 1500 qdisc mq state UP qlen 1000
    link/ether d4:c9:ef:76:fc:c8 brd ff:ff:ff:ff:ff:ff
    inet6 fe80::d6c9:efff:fe76:fcc8/64 scope link
       valid_lft forever preferred_lft forever
5: eth3: <no-carrier,broadcast,multicast,up> mtu 1500 qdisc mq state DOWN qlen 1000
    link/ether d4:c9:ef:76:fc:cc brd ff:ff:ff:ff:ff:ff
6: docker0: <broadcast,multicast,up,lower_up> mtu 1500 qdisc noqueue state UNKNOWN
    link/ether 56:fc:c7:91:d8:5a brd ff:ff:ff:ff:ff:ff
    inet 172.17.42.1/16 scope global docker0
    inet6 fe80::54fc:c7ff:fe91:d85a/64 scope link
       valid_lft forever preferred_lft forever
In our case we have eth2.
3. We add this interface to the docker0 bridge. Edit the /etc/sysconfig/network-scripts/ifcfg-eth2 file:
DEVICE=eth2
TYPE=Ethernet
ONBOOT=yes
NM_CONTROLLED=no
BRIDGE=docker0
4. Bring up the bridge and the interface:
# ifup docker0
# ifup eth2
5. Finally, start the docker service
# service docker start
6. Check the IP of the docker0 bridge and the netmask (/16).
 [root@instance-3903 ~]# ip a
1: lo:  mtu 16436 qdisc noqueue state UNKNOWN
    link/loopback 00:00:00:00:00:00 brd 00:00:00:00:00:00
    inet 127.0.0.1/8 scope host lo
    inet6 ::1/128 scope host
       valid_lft forever preferred_lft forever
2: ibft0:  mtu 1500 qdisc mq state UP qlen 1000
    link/ether f0:92:1c:0d:20:90 brd ff:ff:ff:ff:ff:ff
    inet 100.64.16.18/30 brd 100.64.16.19 scope global ibft0
    inet6 fe80::f292:1cff:fe0d:2090/64 scope link
       valid_lft forever preferred_lft forever
3: eth1:  mtu 1500 qdisc mq state UP qlen 1000
    link/ether f0:92:1c:0d:20:94 brd ff:ff:ff:ff:ff:ff
    inet 84.40.61.210/28 brd 84.40.61.223 scope global eth1
    inet6 fe80::f292:1cff:fe0d:2094/64 scope link
       valid_lft forever preferred_lft forever
4: eth2:  mtu 1500 qdisc mq state UP qlen 1000
    link/ether d4:c9:ef:76:fc:c8 brd ff:ff:ff:ff:ff:ff
5: eth3:  mtu 1500 qdisc mq state DOWN qlen 1000
    link/ether d4:c9:ef:76:fc:cc brd ff:ff:ff:ff:ff:ff
7: docker0:  mtu 1500 qdisc noqueue state UNKNOWN
    link/ether d4:c9:ef:76:fc:c8 brd ff:ff:ff:ff:ff:ff
    inet 172.17.1.1/16 brd 192.168.255.255 scope global docker0
    inet6 fe80::1011:12ff:fe72:ff0d/64 scope link
       valid_lft forever preferred_lft forever
[root@instance-3903 ~]# brctl show docker0
bridge name	bridge id		STP enabled	interfaces
docker0		8000.d4c9ef76fcc8	no		eth2
Start using Docker
This is our ‘Getting started with Docker’ tutorial:
1. Start by getting new Vanilla OS from Dockerhub:
[root@instance-3903 ~]# docker pull centos
centos:latest: The image you are pulling has been verified
511136ea3c5a: Pull complete
5b12ef8fd570: Pull complete
34943839435d: Pull complete
Status: Downloaded newer image for centos:latest
...and start a container with Bash in it:
[root@instance-3903 ~]# docker run -i -t centos /bin/bash
[root@bcebc8292e79 /]#
This container will terminate once you type exit. If you want to make it run in background you can use -d (daemon) instead of -i (interactive) but the process would need to be long-running.
Docker instantiates images and then runs the command provided. To create a custom image you can use something called a Dockerfile which essentially is a list of commands that Docker executes for you and then saves the resulting image. You could do that yourself (using the save command) but this method is repeatable and you can use it again to upgrade all the dependencies.
Create a new Dockerfile script in the current directory. This particular one just installs bc in a container so that we can do some math.
FROM centos
RUN yum -y install bc
Build an image from that Dockerfile:
# docker build -t centos/bc .
You should see it listed here:
# docker images
REPOSITORY          TAG                 IMAGE ID            CREATED             VIRTUAL SIZE
centos/bc           latest              dfbc8b8da250        2 minutes ago       345.7 MB
centos/ipa          latest              ea81724740b1        27 minutes ago      224 MB
centos              latest              34943839435d        6 days ago          224 MB
Test it:
docker run -i -t centos/bc "/bin/bc"
Push to Docker Hub
Pushing to a repo makes it easy to deploy that image on all the hosts in the cluster.
Docker Hub is like github.com but for docker images. It has the same model more or less. Public images are free and private ones need to be payed.
1. Login into Docker Hub. You will need to create an account or use the github.com one:
[root@instance-3903 ~]# docker login
Username: alexandrubordei
Password:
Email: xxx@xxxxx.com
Login Succeeded
2. Rename the image you’ve created previously or recreate it. You need to have your username in the name of the image to be able to push it.
# docker build -t alexandrubordei/bc .
# docker push alexandrubordei/bc
3. Verify you pushed it properly
# docker search alexandrubordei
NAME                         DESCRIPTION   STARS     OFFICIAL   AUTOMATED
alexandrubordei/bc                         0
4. On another host you can pull the image and run it.
# docker pull alexandrubordei/bc
# docker run -i -t alexandrubordei/bc "bc"
bc 1.06.95
Copyright 1991-1994, 1997, 1998, 2000, 2004, 2006 Free Software Foundation, Inc.
This is free software with ABSOLUTELY NO WARRANTY.
For details type `warranty'.
2+3
5
^C
(interrupt) Exiting bc.
I hope this tutorial is useful. Docker has the potential to become a standard in PaaS, so making sure your apps are designed to be deployed like this would make them easier to roll-out and maintain. Our R&D team will provide a better integration with Docker in the months to come. Write us if you’re interested in being a beta tester (we really like beta testers).
We are also investigating the use of YARN as a resource manager on top of a Docker based infrastructure as well as other tools. Stay tuned and if there’s anything else you’d like to know, just drop us a comment and we’ll get right to it.


Leave a Reply
Your email address will not be published.